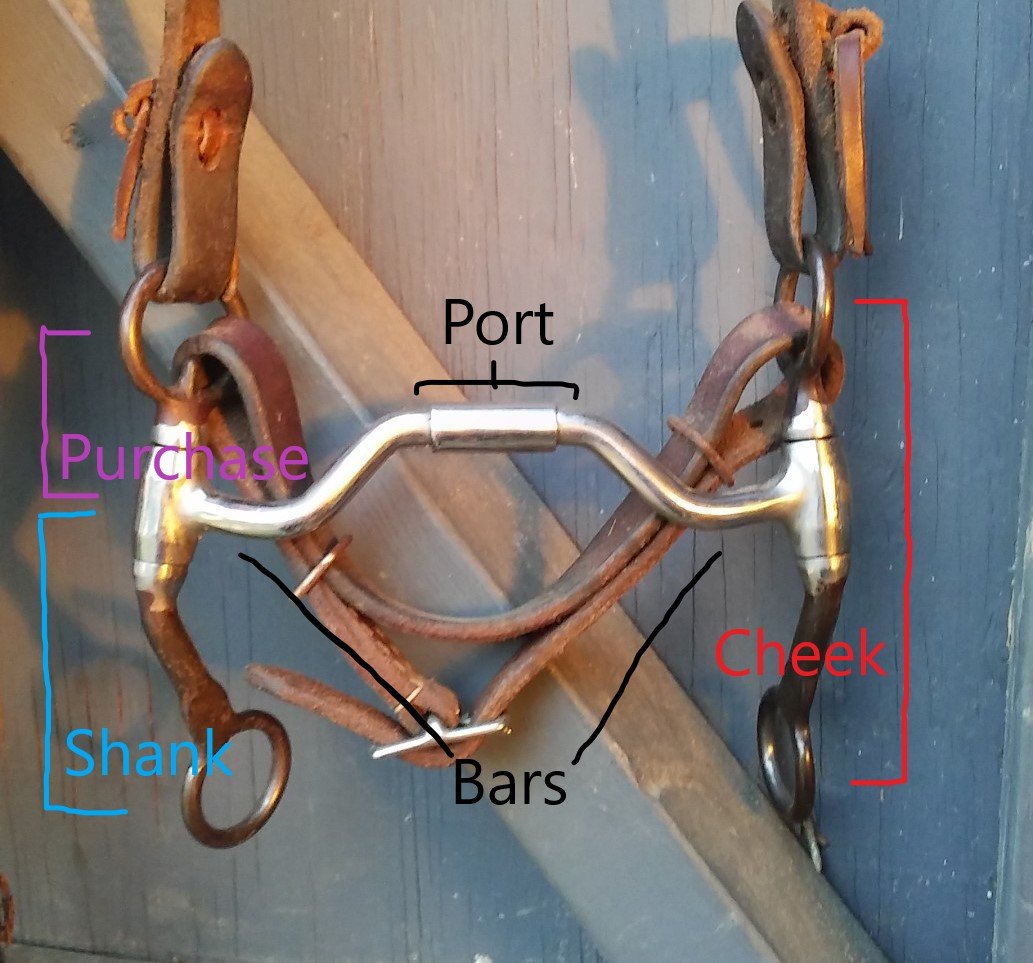
Let’s start with some basic parts of all leverage bits. There are the cheeks, which are made up of the purchase and the shank. Then there is the mouthpiece which is made up of the bars and – on many leverage bits – the port.

Leverage Ratios
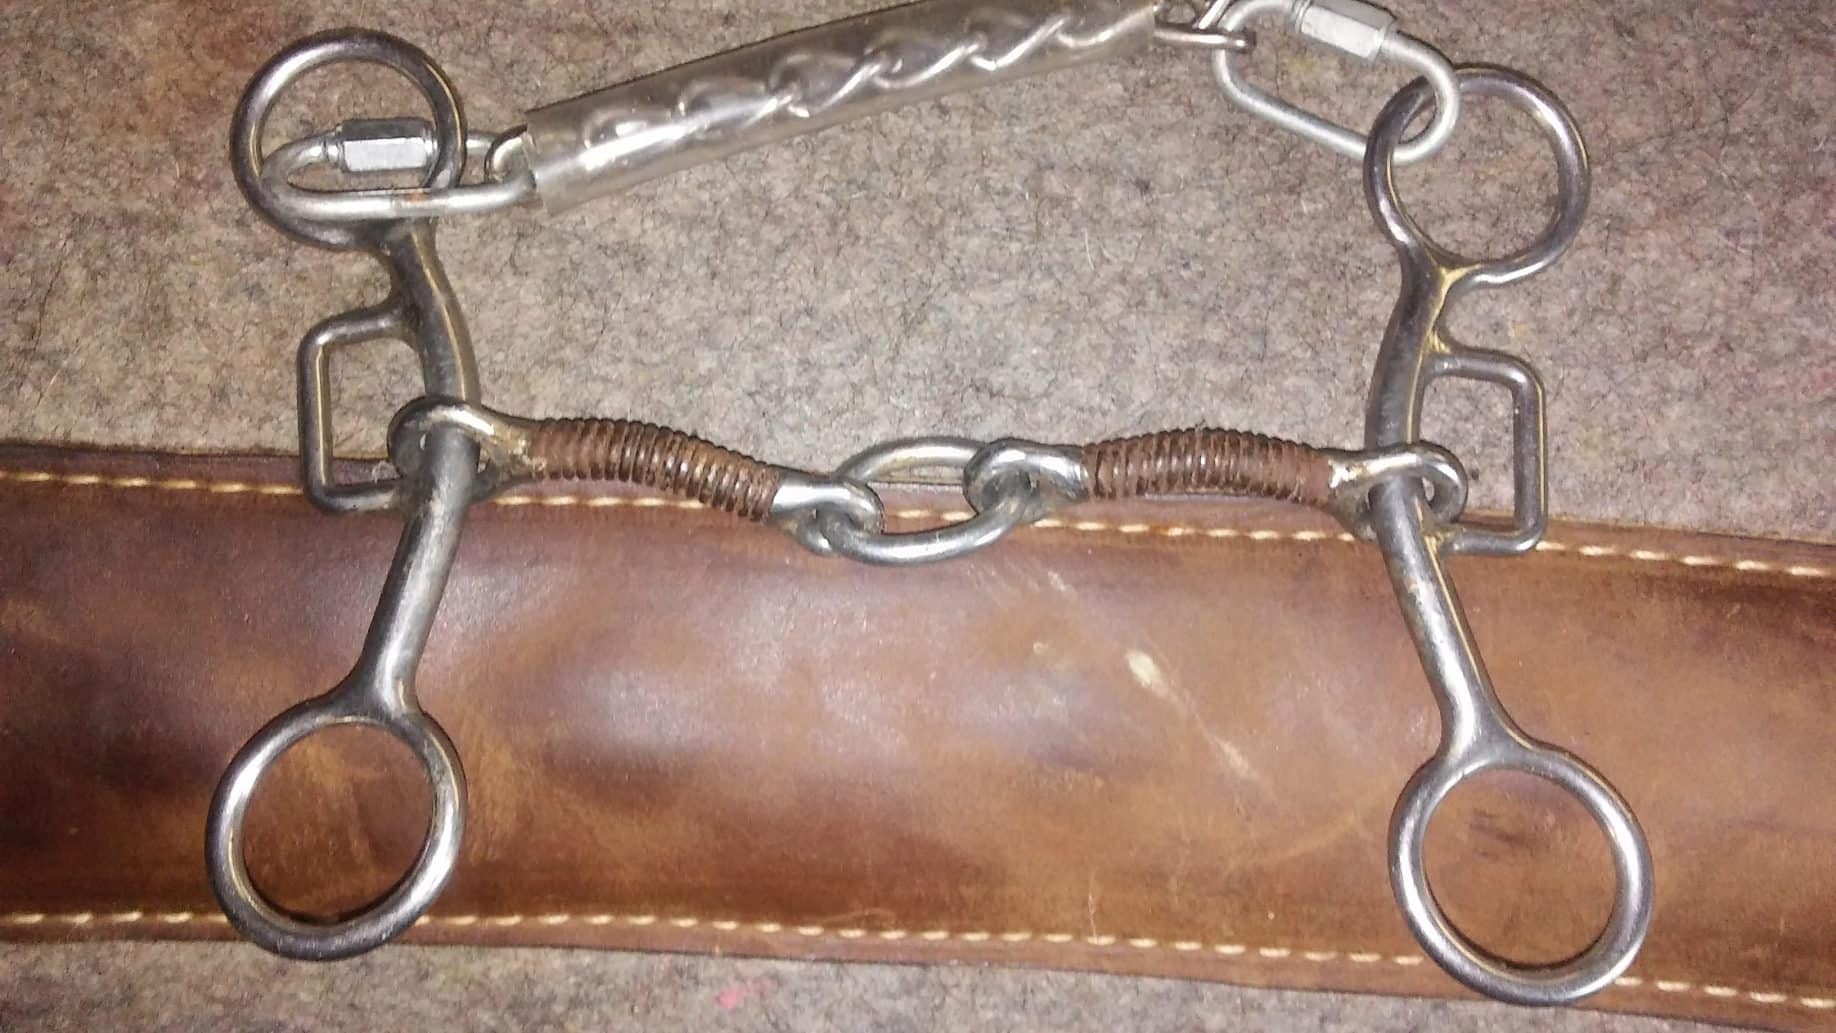
A snaffle bit has a 1:1 leverage ratio. This means that for each pound of pressure exerted on the reins, the horse feels one pound in his mouth. Shanks create more leverage with less pressure on the reins. The ratio of a leverage bit can be found by measuring the length of the shank and the length of the purchase. If you measure the length of the shank and get 2, then measure the purchase and get 1, that particular bit has a ratio of 1:2, meaning that for every 1 pound you exert on the reins, the horse feels 2 pounds in his mouth. A change in the ratio of purchase to shank changes how the bit works and where it puts the most pressure.
Length of Shanks
Generally, shorter the shanks means a milder bit. Shorter shanks magnify the rein cues less than with long shanks. Long shanks are usually more severe as it takes less rein to put pressure on the mouth. These are most commonly seen in events such as reining where a rider’s cues are expected to be nearly invisible. A long-shanked bit allows the smallest movement to translate clearly to the horse.
Angle of Shanks
But it’s not just the length of the shank that matters. The straighter the shanks are, the less warning the horse gets before the action of the bit is engaged. It takes less rein movement to move straight shanks. This, generally means that a straight shanked bit is harsher because there is little warning before the full pressure of the cue is applied. A swept back shank, on the other hand, allows more warning for the horse before the bit is engaged because you have to pick up more rein to contact the bit.
But knowing the length and angle of the shanks isn’t enough. Yes, you still have more options. To swivel or not to swivel, that is the next question.
Swivel Shanks vs. Solid Shanks
Swivel shanked bits have a joint where the mouthpiece meets the cheek. The entire cheek piece can move independently from the rest of the bit. These bits allow a more sensitive feel for both horse and rider due to the mobility of the shanks and allows for a one rein stop in case of emergency.
Solid or immobile shanks are some of the most common western bits you will find. They are designed for a horse that neck reins well. They don’t allow one rein correction and there is not as much feel in them.
What about gag bits?
So, we’re done…right? But what about those gag bits you see everyone running around with, you ask? What if I want one of those?
Don’t get a gag bit unless you know what you’re doing and have a specific purpose for it. A little bit of gag goes a long way. There is such a thing as too much gag. Don’t ever get one of those “wonder bits”. Trust me. Been there done that, got the scars to prove it. DON’T.
My Recommendation for Your First Leverage Bit
Now, for those of you who are just stepping up into the curb bit from a snaffle and are now going into information overload, my recommendation for you would probably be a short-shanked bit with a nice amount of sweep, swivel shanks, and a mouthpiece much like your preferred style of snaffle. A good example would be a bit like one of these:
A small leverage bit with a dog bone roller mouthpiece is a good starting point for a horse that is stiff and might need more bend. This is the most user-friendly of two options.
A small leverage bit with a low port barrel mouthpiece (the bit in the diagram) is best for a horse that is way too bendy in the neck and needs to stiffen up and carry himself a little better or for a horse with a low pallet. This is the one I use the most. However, You have to make sure you’re pulling the reins straight back if you are letting your hand drift out at an angle the bit won’t work. It’s not a hard bit to master, but you do have to watch where your hands at first to make sure you’re engaging the bit correctly.


Please get rid of the Pinterest, Twitter, Facebook and Instagram icons on the left side of the page.
You can’t get rid of them and they are really annoying when you’re trying to read.
Please get rid of the Pinterest, Twitter, Facebook and Instagram icons on the left side of the page.
You can’t get rid of them and they are really annoying when you’re trying to read.
Hi thanks for the article I’ve been trying to find information on this subject. Do you have any references? I’d like to dig a little deeper thanks
Link not working please make recommendations
Thank you for pointing that out Sandy. The link has been fixed and a second recommendation has been added.