
The reining spin is a coveted pinnacle of achievement for many amateur western riders, yet if you don’t have access to a reining trainer, it can be difficult to teach yourself some of the maneuvers.
There are many methods for achieving a reining spin, but the method we will discuss today involves 3 exercises: the backing exercise, the star exercise, and the spiral exercise.
Prerequisites

- Forward momentum
- Even tempo
- Square stop
- Yield forequarters (turn on the haunches)
- Straightness through the body
- Softness in the poll
- Lightness on the bit
- Collection/roundness
- Soft backup
- Roll-back
The Backing Exercise
A reining spin is generally taught starting with the backing method. This beginning stage assumes that your horse already knows how to backup lightly and responsively. If you are having trouble with this, go back and read my article on teaching the western backup.
This will start out teaching a spin to the right.
1. Pick up on the reins and put the horse into a backup.
2. Tilt the horse’s nose to the right and lightly bump with your right heel (or spur if you use them). This will put the horse in circle backing to the left. This will get the horse really bending their hocks and working their hind end.
3. Release you driving aids and cue a rollback to the right with your left leg. The horse should cross over in a rollback to the right. This will produce a quarter of a spin.
The Star Exercise
Once the horse is good at rolling back while backing a circle, it is time to move on to the star exercise. This exercise establishes the pivot foot for the spin. A proper reining spin should be executed with the inside foot planted as the pivot foot. So, for a left spin, the left foot is planted and for the right spin the right foot is planted. If your horse is planting the wrong foot, your problem is simply a lack a forward motion. Yes, forward motion. We started with a backing exercise, but the real key to the final spin is actually forward motion. Bear with me.
The first 3 steps are the steps to teaching a roll-back.
1. Pick a flat open area. Ride a five-pointed star. When you come to a point, sit and stop square.
2. Immediately carry that forward momentum into a turn on the haunches (yield the forequarters). The horse will roll-back over his hocks. Drive him forward out of the rollback. If you don’t he will start sucking back over his hocks and plant the wrong foot.
3. Repeat. The five-point start just keeps going so it’s easy for one roll-back to flow into another.
Once you are getting solid rollbacks on the correct picot foot, you can up the ante.
4. Push for more of a spin. Keep pushing the turn until he starts sucking back. As soon as he sucks back drive him forward out of the turn. If you have good timing, it usually won’t be long before your horse is giving you half and even a full rotation.
Another exercise you can use to achieve the same result while switching things up for your horse is the spiral exercise.
The Spiral Exercise
1. Trot (or walk) a small circle and gradually tighten the circle until the horse sits down and turns over his hocks.
2. As soon as you feel the horse sucking back, push the horse out of it into the gait you started with.
3. Rinse and repeat. Push for more each time until you feel the horse sucking back, then push them out of it.
Keys to Success
1. Don’t over drill! No more than 5 minutes a day on spinning as it is hard on their joints. This should never be done on a young horse under 4, preferably not even until the growth plates have closed which can be as late as 6 for many stock breeds. I know, the industry standard is to push 2 and 3-year-olds into this kind of training to make the big money futurities, but there is a reason why top-level futurity horses are rarely sound past age 10. They get pushed too hard too soon and ruin their joints.
2. Pick a stationary point on the fence in front of you and ride straight to it. This will help keep you centered.
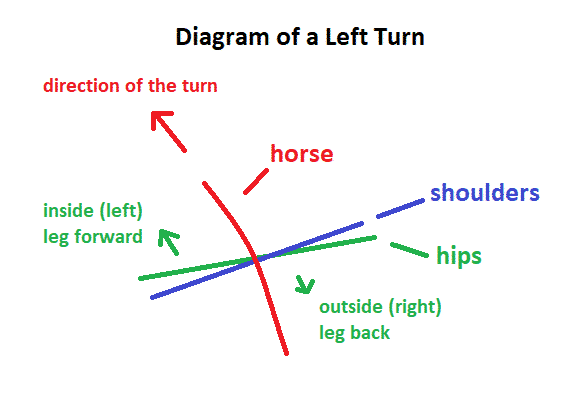
3. Always keep your shoulders square with the shoulders of the horse.
4. Do not anticipate the turn. Make sure you stop square.
5. If you have good timing, skip the walk and start at a trot. If your timing isn’t always quite on point, start at the walk.
6. Don’t worry about making a perfect five-point star.
7. Keeping your body straight will help keep the horse’s body straight.
Common Rider Mistakes
1. Not stopping square
The rider anticipating the turn is just as bad — or worse — as the horse anticipating the turn. You can accidentally tech the horse to anticipate and create sloppy, rushed turns.
2. “Helping” the horse through the turn with their body
Don’t try to push the horse through the turn. Keep your shoulders square with his and keep your body straight to keep you both balanced. This is best thing you can do to help him make a smooth, balanced turn.
Common Horse Mistakes
1. Spins on the wrong hind foot
If your horse is planting the wrong foot, your problem is simply a lack a forward motion. As soon as you feel the horse start sucking back, push the horse out of the spin at a trot.
Photo by Just chaos



Great Article! Thank you for sharing this is a very informative post, and looking forward to the latest one
Wow! I really love the breakdown of this move! Great job providing value to your readers!
Thank you. Glad you enjoyed it!
This is awesome! I have always been so fascinated with reining!
I’m glad you enjoyed it! If you want to learn more about reining you can check out our new article on the difference between reining and reined cow horse. Thanks for stopping by!
I love this step by step guide to reining! Amazing information in a very readable way. I know nothing about the mechanics of reining, and this have given me some amazing insight. It always looks so effortless to watch!
I’m glad you enjoyed it! Yes, reining does look quite effortless. It is surprising sometimes how simple the building blocks are when you break it down into the individual parts.