
This is part 2 of a 3-part series that will cover my 3 most important exercises that every horse needs to know to make them a safe riding companion:
- Lunging
- Lateral flexion at the poll (not in the neck)
- Yielding the hindquarters
In Part 1, we covered lunging. Now we are moving on to Part 2: Lateral Flexion of the Poll (not the neck).
When done properly, lateral flexion frees up the poll and is crucial to later, more advanced maneuvers such as backing, leg yielding, and…well…pretty much everything.
Lateral flexion does not mean yoinking the poor horse’s head around until he’s chewing on his own ribcage. I call 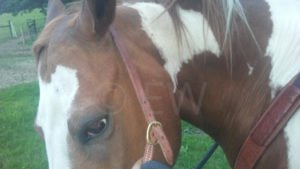 that rubbernecking because it makes their neck all flexy and bendy and causes way more problems than it fixes.
The point of flexion is to loosen up the poll, not make the neck into a limp noodle. Proper lateral flexion should only flex the poll and never flex past 90*. In fact, I don’t worry about measuring how far it flexes because “how far” is not the point. The point of lateral flexion is obtaining the release of the poll muscles.
What is the poll and why is it important?
The poll is the point where the neck joins the head right behind the ears. Tension in the poll causes tension in the rest of the body. Horses that brace against the bit, root their nose, and bolt are bracing their poll. Tension and bracing in the poll can become dangerous as it can get to the point where the horse locks their poll and jaw which essentially renders the bit useless and leaves the rider at the horse’s mercy. This is not a position you want to end up in (just ask my shattered spine how I know this).
How is this method of flexion different from popular methods?
There are many trainers who will try to fix this problem by jumping on the flexion bandwagon. They are partly correct. Flexion is necessary to loosen the poll, but the flexion that has become so popular and widespread does not flex the poll.
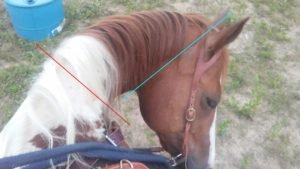
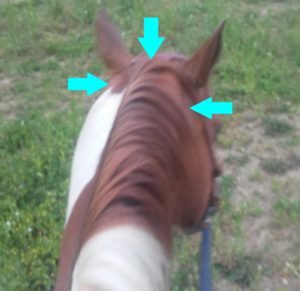
First, let us understand exactly where the poll is. In the photo below you will see the green line behind the ears designating the position of the poll. The red line further down the neck is the point where the popular natural horsemanship methods encourage flexing the neck. Notice how the red line is nowhere near the poll.
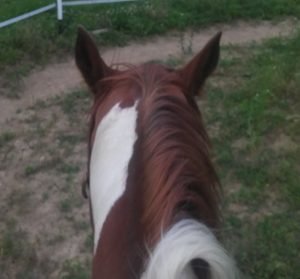
The flexion that has been so popularized by natural horsemanship gurus looks something like this:
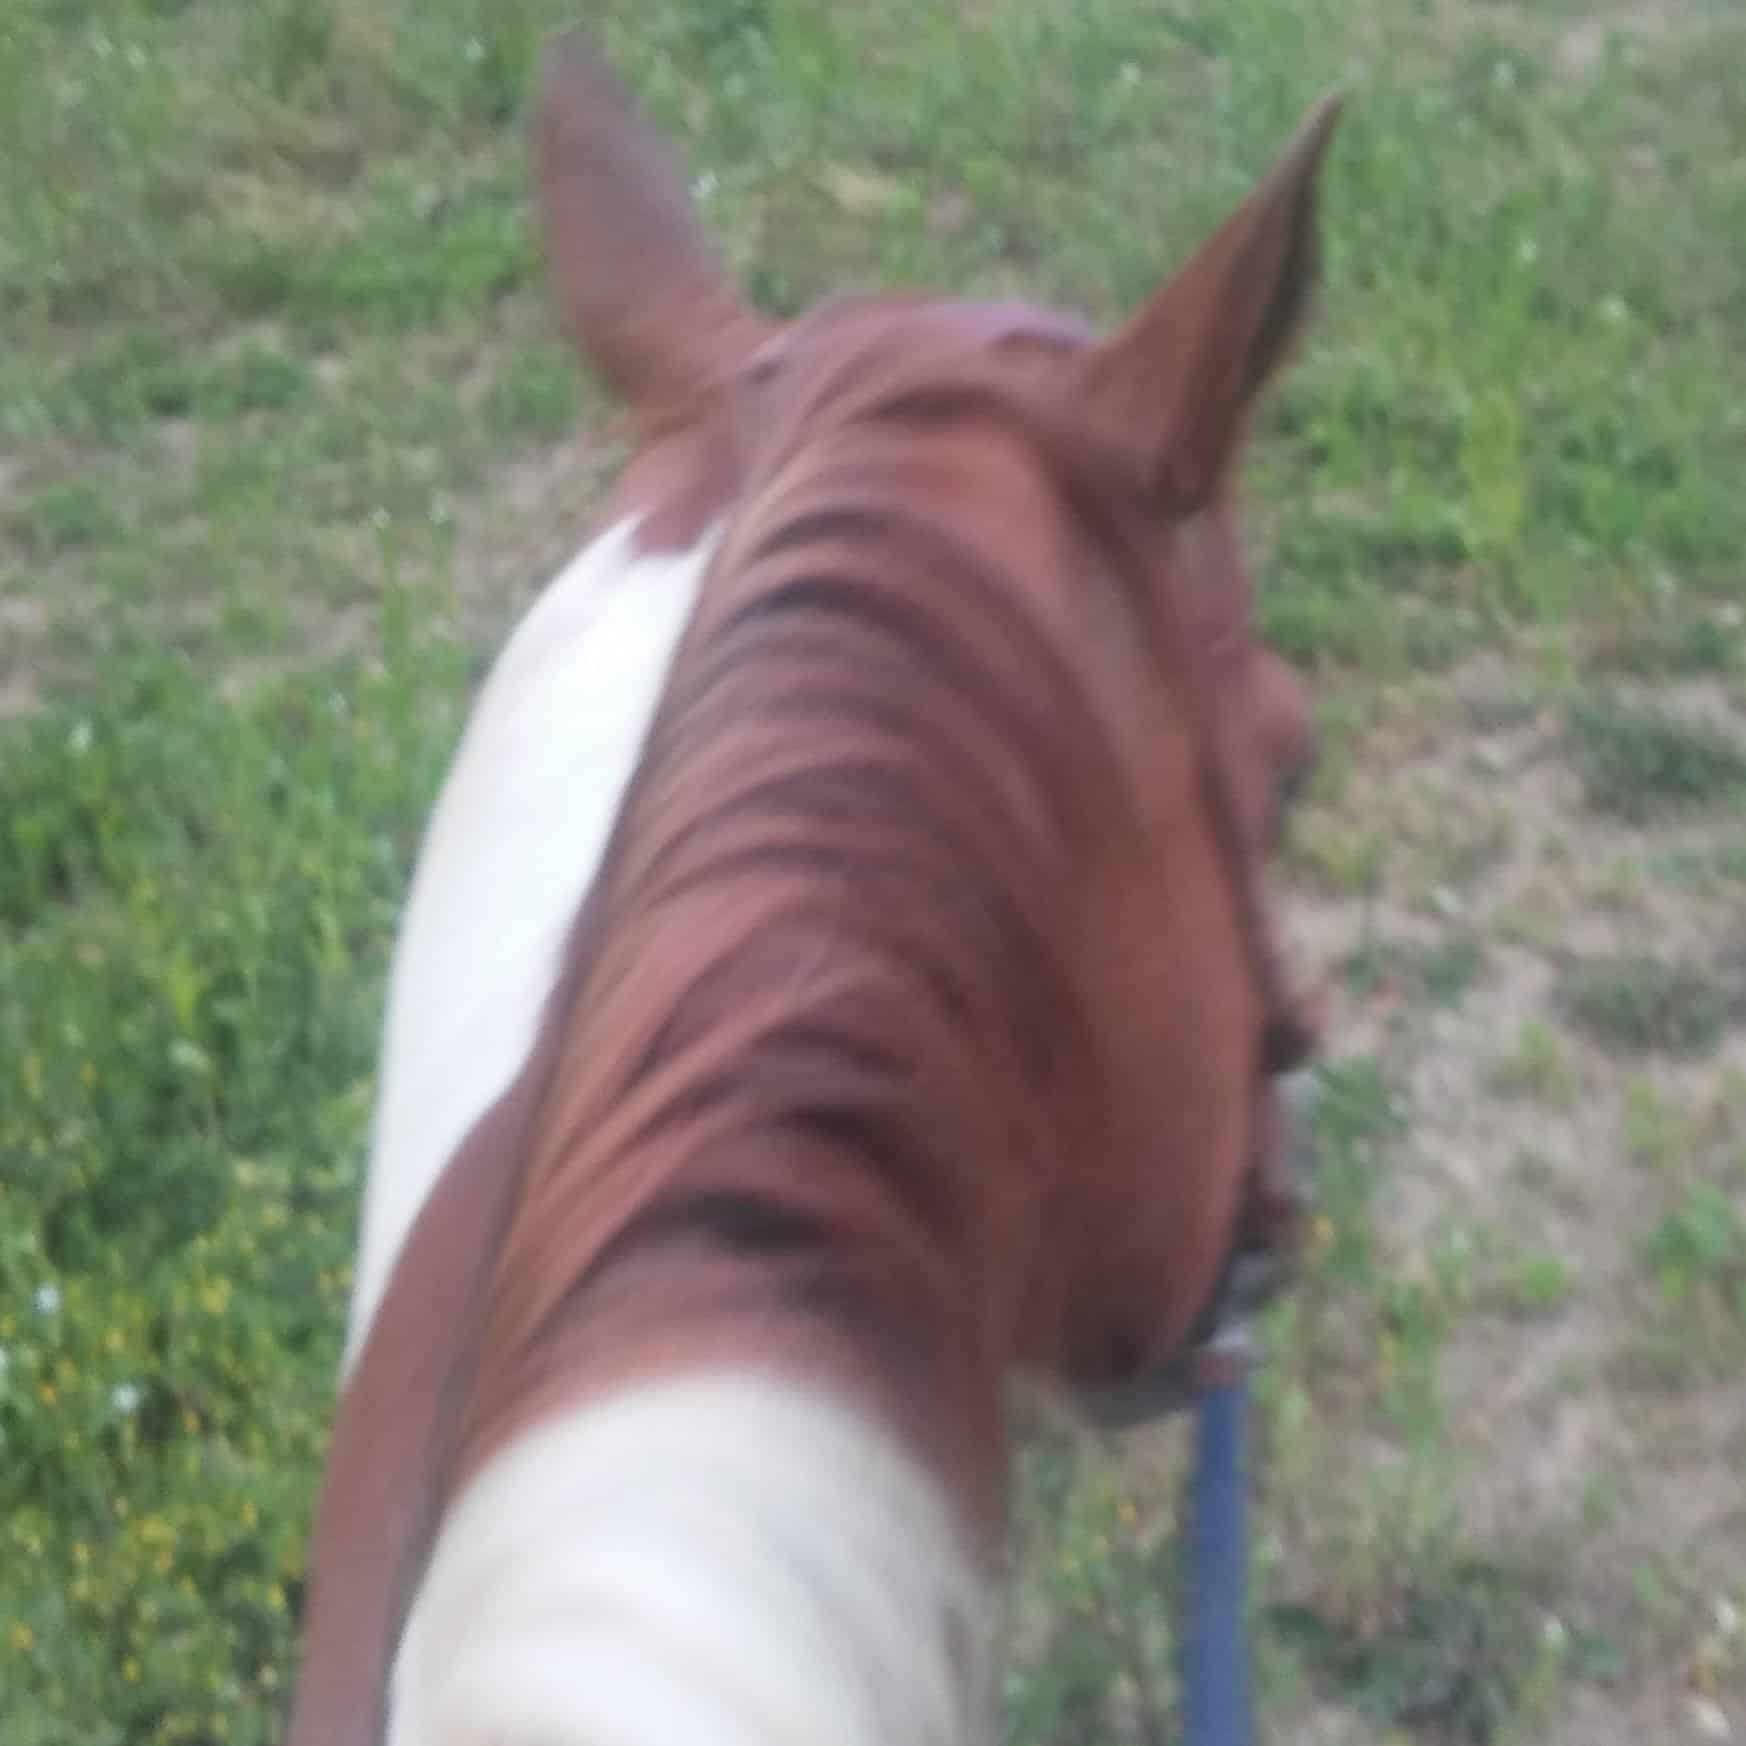
Note how the flex point is back where the red line is and, while the poll is getting flexed a little, that is not the focus of the exercise. Note how the poll isn’t really flexed. It is swinging to the side like it is on a pivot. There is no release in the poll muscles. Here is what flexing the poll really looks like:
Note the big difference in the flex point. It barely looks like the head has moved at all, but all the movement is in the poll area. It’s not about how far the head has moved. It is about getting those poll muscles to release. Just because a horse tilts their head does not mean the muscles have released. It takes practice to develop the feel and good timing on the release.
If the horse swings their nose out to the side without releasing the muscles of the poll, the nose will swing straight out to the side like it is on a pivot. That is not true flexion of the poll. As soon as the nose starts to tip back towards the rider, that is a sign the muscles over the poll are releasing. The release of the pressure should come as soon as you see those muscles over the poll flexing and releasing.
The best way to teach this simple exercise
There is no long process for this exercise. Choose the side you wish to start on. Gently pick up on that rein until you make contact. Make sure your rein is adjusted short enough so you are not pulling your arm too far back. Slowly increase the pressure on that rein. If your horse leans into steady pressure, open and close your hand around the rein in order to bump him just enough to make leaning into the pressure uncomfortable. Keep steady contact. As soon as that poll starts to loosen, release. The hardest thing about this exercise is finding balance between too much pressure and not enough. It takes a very light hand. It can be tricky to get some horses to flex without overbending, especially if they are taught to overflex through more popular methods. In these cases, you may need to steady your horse with light pressure to the outside rein to make it clear that you want flexion, but not too much bend. This extra support will help most horses get the point. Be careful that you are not pulling on the outside rein though. Supporting with the outside rein and pulling with the outside rein are two different things.
Like everything else, the first time you attempt this, the smallest try from the horse should be rewarded. The moment he releases the tiniest bit, he should be given release from the pressure and rewarded. The photo above is the beginning stages of lateral poll flexion. As the poll gets looser, the nose will begin to come down and lateral flexion will quickly morph into vertical flexion. This is a sign that you are doing it right.
Stay tuned for Part 3: Yielding the Hindquarters!
Subscribe to our email list for more handy tips and tricks delivered straight to your inbox!


: Yielding the Hindquarters")
: Lunging")


I would love for you to go more into what the transition and end goal should look like / be for vertical flexion. Your final paragraph began on it, and I just want more!
I would love to see a video of this… the right photo is a bit blurry.